댓글을 작성하려면 로그인이 필요합니다.
아직 작성된 댓글이 없어요. 첫 댓글을 남겨주세요!
내가 스프링을 많이 사용하고 어떻게 구동이 되는지 대충 알지만,
문뜩 실행했을때 로그들이 실행이 어떻게 되는지가 궁금해져서 글을 작성한다.
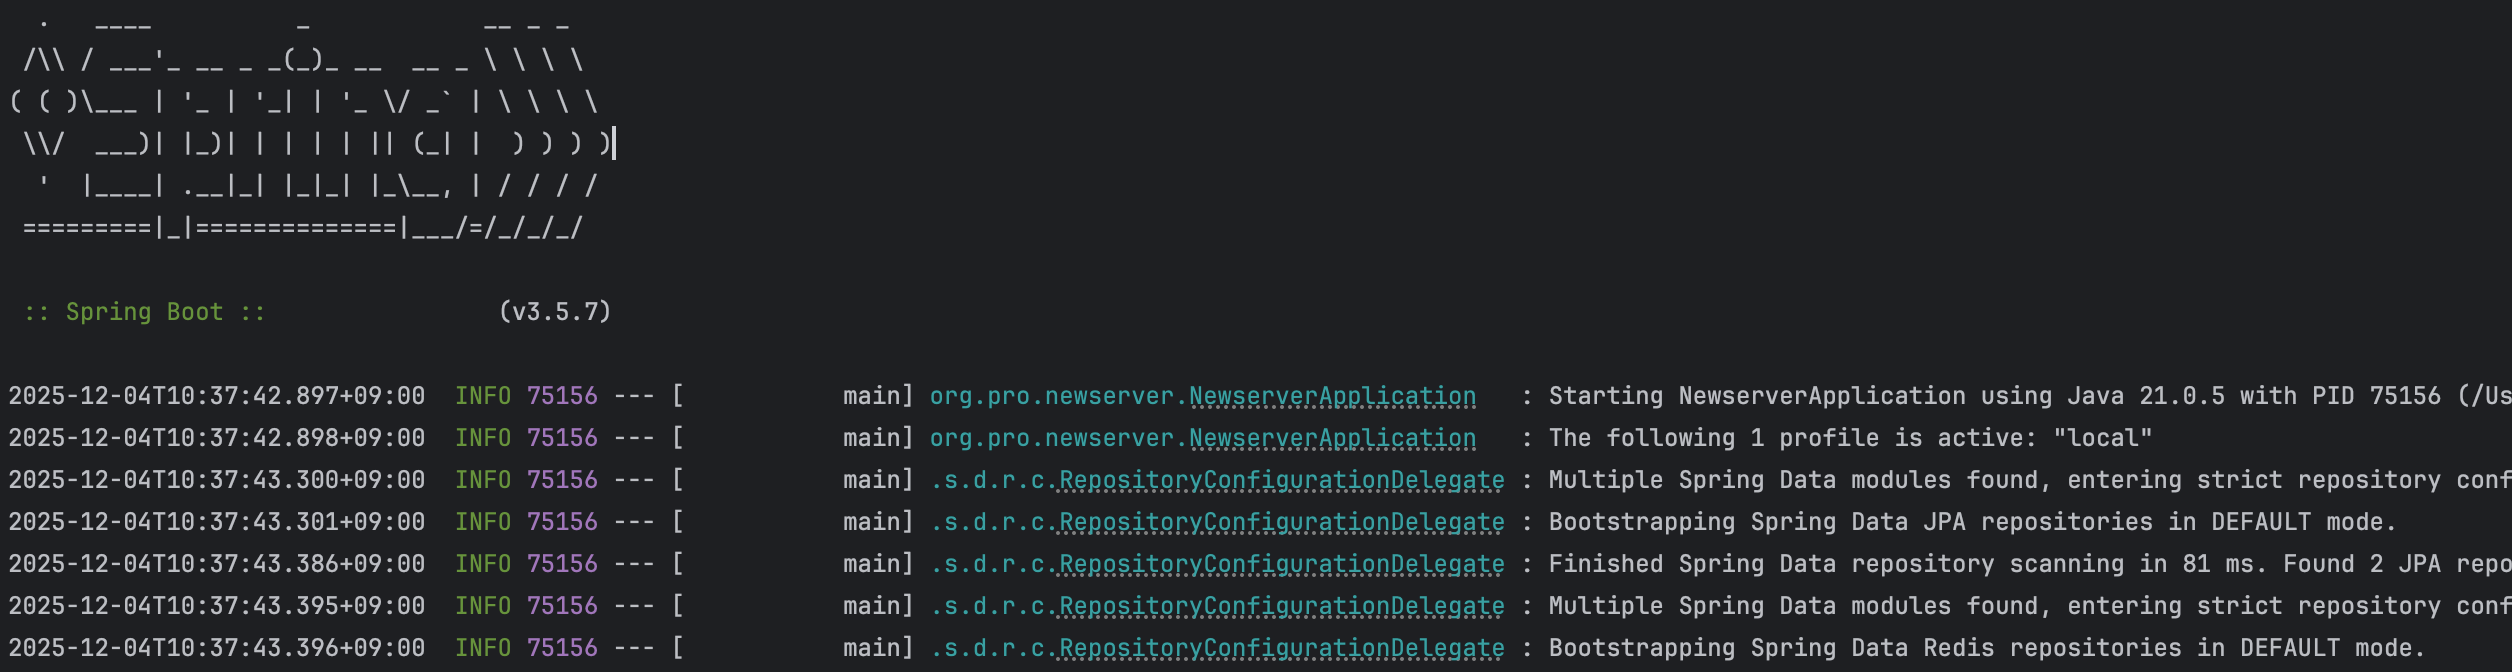
Spring Boot 애플리케이션을 실행하면 콘솔에 이런 로그가 쭉 올라온다.
매일 보는 로그라서 신경쓰고 있지 않았지만, 정확히 어디에서 어떻게 찍혀오고
어떤 형태로 코드가 작성되었을지 궁금해졌다.
우리는 항상 그렇듯, 애플리케이션을 실행한다. 실행하면 Main() 메소드가 실행된다.
@SpringBootApplication
public class NewserverApplication {
    public static void main(String[] args) {
        SpringApplication.run(NewserverApplication.class, args);
    }
}
우리는 이것을 실행하고, 나머지는 전부 SpringApplication.run() 내부에서 일어난다.
public static ConfigurableApplicationContext run(Class<?> primarySource, String... args) {
    return run(new Class<?>[] { primarySource }, args);
}

public static ConfigurableApplicationContext run(Class<?>[] primarySources, String[] args) {
    return new SpringApplication(primarySources).run(args);
}
첫번째 메소드는 단일 클래스 배열로 감싸서 두 번째 메소드를 호출한다.
그러면 SpringApplication 인스턴스를 생성하고, 인스턴스 메서드인 run(args)를
호출한다
static 메서드는 편의를 위한 진입점일 뿐이고, 실제 기동 로직은 인스턴스 메서드에 있다.
이렇게 분리한 이유는 SpringApplication 객체를 직접 생성해서 커스터마이징할 수 있게 하기 위해서다.
SpringApplication app = new SpringApplication(MyApplication.class);
app.setBannerMode(Banner.Mode.OFF);
app.run(args);
이런식으로 배너를 끄거나, 프로파일을 추가하거나, 리스너를 등록할 수 있다.
이제 중요한 run(String... args)를 봐보자
public ConfigurableApplicationContext run(String... args) {
    long startTime = System.nanoTime();
    DefaultBootstrapContext bootstrapContext = createBootstrapContext();
    ConfigurableApplicationContext context = null;

    configureHeadlessProperty();
    SpringApplicationRunListeners listeners = getRunListeners(args);
    listeners.starting(bootstrapContext, this.mainApplicationClass);

    try {
        ApplicationArguments applicationArguments = new DefaultApplicationArguments(args);
        ConfigurableEnvironment environment = prepareEnvironment(listeners, bootstrapContext, applicationArguments);
        Banner printedBanner = printBanner(environment);
        context = createApplicationContext();
        prepareContext(bootstrapContext, context, environment, listeners, applicationArguments, printedBanner);
        refreshContext(context);
        afterRefresh(context, applicationArguments);

        Duration timeTaken = Duration.ofNanos(System.nanoTime() - startTime);
        if (this.logStartupInfo) {
            new StartupInfoLogger(this.mainApplicationClass).logStarted(getApplicationLog(), timeTaken);
        }
        listeners.started(context, timeTaken);
        callRunners(context, applicationArguments);
    } catch (Throwable ex) {
        throw handleRunFailure(context, ex, listeners);
    }

    listeners.ready(context, Duration.ofNanos(System.nanoTime() - startTime));
    return context;
}
이렇게 생겼다. 한줄씩 뜯어서 곱씹어보자!
startTime 기록
long startTime = System.nanoTime()
나노초 단위로 시작 시간을 기록한다. 나중에 "Started in 2.583 seconds" 로그를 찍을 때
이 값을 사용한다. System.currentTimeMillis() 대신 nanoTime()을 쓰는 이유는
시스템 시계 변경에 영향받지 않는 단조 증가 시간이기 때문이다.
BootstrapContext 생성
DefaultBootstrapContext bootstrapContext = createBootstrapContext();
BootstrapContext는 ApplicationContext가 생성되기 전에 필요한 객체들을
담아두는 **임시 컨테이너다.**예를 들어 Environment를 준비하는 과정에서 필요한 객체들을
여기에 등록해둔다. ApplicationContext가 완전히 준비되면 BootstrapContext는 닫힌다.
Headless 설정
configureHeadlessProperty();
Java의 headless 모드를 설정한다. Headless 모드는 디스플레이, 키보드,마우스가 없는
서버 환경에서 GUI 관련 클래스를 사용할 때 필요하다. java.awt.headless 시스템 프로퍼티를
true로 설정해서 서버 환경에서도 이미지 처리 같은 작업이 가능하게 한다.
RunListeners 획득 및 starting 이벤트
SpringApplicationRunListeners listeners = getRunListeners(args);
listeners.starting(bootstrapContext, this.mainApplicationClass);
SpringApplicationRunListeners는 기동 과정의 각 단계에서 이벤트를 발행하는
역할을 한다. getRunListeners()는 spring.factories 파일에서 SpringApplicationRunListener 구현체들을 찾아서 로드한다.
listeners.starting()을 호출하면 ApplicationStartingEvent가 발행된다.
아직 ApplicationContext가 생성되기 전이므로, 이 이벤트를 받으려면 리스너를 SpringApplication에 직접 등록해야 한다.
ApplicationArguments 파싱
ApplicationArguments applicationArguments = new DefaultApplicationArguments(args);
커맨드라인 인자를 파싱한다. --server.port=9090 같은 옵션 인자와 일반 인자를 구분해서 저장한다.
나중에 ApplicationRunner나 CommandLineRunner에서 이 인자들에 접근할 수 있다.
Environment 준비
ConfigurableEnvironment environment = prepareEnvironment(listeners, bootstrapContext, applicationArguments);
Environment는 프로파일(local, dev, prod)과 프로퍼티 소스(application.yml, 환경변수, 시스템 프로퍼티)를
관리한다. 이 단계에서 application.yml이 로드되고, 활성 프로파일이 결정된다.
배너 출력
Banner printedBanner = printBanner(environment);
콘솔에 Spring Boot 배너를 출력한다.
ApplicationContext 생성
context = createApplicationContext();
애플리케이션 타입에 따라 적절한 ApplicationContext를 생성한다. 웹 애플리케이션이면 AnnotationConfigServletWebServerApplicationContext, 리액티브면 AnnotationConfigReactiveWebServerApplicationContext, 둘 다 아니면 AnnotationConfigApplicationContext를 생성한다.
Context 준비
prepareContext(bootstrapContext, context, environment, listeners, applicationArguments, printedBanner);
생성된 Context에 Environment를 설정하고, 각종 초기화 작업을 수행한다.
프로파일 로그도 이 단계에서 찍힌다.
Context refresh
refreshContext(context);
ApplicationContext.refresh()가 호출되면서 모든 Bean들이 생성되고,
Auto-configuration이 적용되고, 내장 톰캣이 시작된다. 대부분의 로그가 이 단계에서 찍힌다.
기동 완료
Duration timeTaken = Duration.ofNanos(System.nanoTime() - startTime);
if (this.logStartupInfo) {
    new StartupInfoLogger(this.mainApplicationClass).logStarted(getApplicationLog(), timeTaken);
}
listeners.started(context, timeTaken);
callRunners(context, applicationArguments);
시작 시간과 현재 시간의 차이로 기동 시간을 계산하고, "Started in X seconds" 로그를 찍는다.
그 후 ApplicationRunner와 CommandLineRunner를 실행한다.
  .   ____          _            __ _ _
 /\\ / ___'_ __ _ _(_)_ __  __ _ \ \ \ \
( ( )\___ | '_ | '_| | '_ \/ _` | \ \ \ \
 \\/  ___)| |_)| | | | | || (_| |  ) ) ) )
  '  |____| .__|_| |_|_| |_\__, | / / / /
 =========|_|==============|___/=/_/_/_/

 :: Spring Boot ::                (v3.5.7)
run() 메서드에서 printBanner(environment)가 호출된다.
private Banner printBanner(ConfigurableEnvironment environment) {
    if (this.bannerMode == Banner.Mode.OFF) {
        return null;
    }
    ResourceLoader resourceLoader = (this.resourceLoader != null)
        ? this.resourceLoader
        : new DefaultResourceLoader(null);
    SpringApplicationBannerPrinter bannerPrinter = new SpringApplicationBannerPrinter(resourceLoader, this.banner);

    if (this.bannerMode == Mode.LOG) {
        return bannerPrinter.print(environment, this.mainApplicationClass, logger);
    }
    return bannerPrinter.print(environment, this.mainApplicationClass, System.out);
}
먼저 bannerMode를 확인한다. OFF면 배너를 출력하지 않고 바로 null을 반환한다.
Banner.Mode는 세 가지 값이 있다:
OFF: 배너 출력 안 함
CONSOLE: System.out으로 출력 (기본값)
LOG: 로거를 통해 출력
ResourceLoader는 banner.txt 같은 커스텀 배너 파일을 로드할 때 사용한다. SpringApplicationBannerPrinter가 실제 출력을 담당하는데,
커스텀 배너 파일이 없으면 SpringBootBanner를 사용한다.
class SpringBootBanner implements Banner {

    private static final String[] BANNER = {
        "",
        "  .   ____          _            __ _ _",
        " /\\\\ / ___'_ __ _ _(_)_ __  __ _ \\ \\ \\ \\",
        "( ( )\\___ | '_ | '_| | '_ \\/ _` | \\ \\ \\ \\",
        " \\\\/  ___)| |_)| | | | | || (_| |  ) ) ) )",
        "  '  |____| .__|_| |_|_| |_\\__, | / / / /",
        " =========|_|==============|___/=/_/_/_/"
    };

    private static final String SPRING_BOOT = " :: Spring Boot :: ";

    @Override
    public void printBanner(Environment environment, Class<?> sourceClass, PrintStream printStream) {
        for (String line : BANNER) {
            printStream.println(line);
        }
        String version = SpringBootVersion.getVersion();
        version = (version != null) ? " (v" + version + ")" : "";

        StringBuilder padding = new StringBuilder();
        while (padding.length() < STRAP_LINE_SIZE - (SPRING_BOOT.length() + version.length())) {
            padding.append(" ");
        }

        printStream.println(AnsiOutput.toString(
            AnsiColor.GREEN, SPRING_BOOT,
            AnsiColor.DEFAULT, padding.toString(),
            AnsiStyle.FAINT, version
        ));
        printStream.println();
    }
}
BANNER 배열에 ASCII 아트가 하드코딩되어 있다. printBanner() 메서드는
이 배열을 순회하면서 한 줄씩 PrintStream에 출력한다.
버전 정보는 SpringBootVersion.getVersion()으로 가져온다.
이 메서드는 spring-boot.jar의 META-INF/MANIFEST.MF 파일에서
Implementation-Version 값을 읽어온다.
AnsiOutput.toString()은 ANSI 이스케이프 코드를 사용해서 터미널에 색상을 입힌다.
:: Spring Boot ::는 초록색으로, 버전은 흐린 스타일로 출력된다.
터미널이 ANSI를 지원하지 않으면 그냥 일반 텍스트로 출력된다.
Starting NewserverApplication using Java 21.0.5 with PID 75156
run() 메서드 초반에 StartupInfoLogger가 이 로그를 찍는다.
if (this.logStartupInfo) {
    new StartupInfoLogger(this.mainApplicationClass).logStarting(getApplicationLog());
}
logStartupInfo 필드는 기본값이 true다. StartupInfoLogger는 메인 클래스를
인자로 받아서 생성되고, logStarting() 메서드가 호출된다.
void logStarting(Log applicationLog) {
    if (applicationLog.isInfoEnabled()) {
        applicationLog.info(getStartingMessage());
    }
    if (applicationLog.isDebugEnabled()) {
        applicationLog.debug(getRunningMessage());
    }
}
로그 레벨이 INFO 이상이면 getStartingMessage()의 결과를 출력한다.
DEBUG 레벨이면 추가로 더 상세한 정보를 출력한다.
private CharSequence getStartingMessage() {
    StringBuilder message = new StringBuilder();
    message.append("Starting ");
    appendApplicationName(message);
    appendVersion(message, this.sourceClass);
    message.append(" using Java ");
    message.append(System.getProperty("java.version"));
    message.append(" with PID ");
    message.append(ApplicationPid.get());
    appendOn(message);
    appendContext(message);
    return message;
}
StringBuilder로 메시지를 조립한다. 각 부분을 살펴보면:
애플리케이션 이름(appendApplicationName): 메인 클래스의 단순 이름을 사용한다. org.pro.newserver.NewserverApplication에서 NewserverApplication만 추출한다.
Java 버전: System.getProperty("java.version")으로 JVM의 Java 버전을 가져온다.
여기서는 21.0.5다.
PID: ApplicationPid.get()으로 현재 프로세스 ID를 가져온다.
public class ApplicationPid {
    private final Long pid;

    public ApplicationPid() {
        this.pid = currentProcessPid();
    }

    private Long currentProcessPid() {
        try {
            return ProcessHandle.current().pid();
        } catch (Throwable ex) {
            return null;
        }
    }

    public static String get() {
        return new ApplicationPid().toString();
    }
}
Java 9부터 추가된 ProcessHandle.current().pid()를 사용한다. 이전에는 JMX의 RuntimeMXBean을 파싱하는 복잡한 방법을 썼지만, 이제는 깔끔하게 한 줄로 가져올 수 있다.
The following 1 profile is active: "local"
prepareContext() 단계에서 logStartupProfileInfo()가 호출된다.
private void prepareContext(DefaultBootstrapContext bootstrapContext,
        ConfigurableApplicationContext context,
        ConfigurableEnvironment environment,
        SpringApplicationRunListeners listeners,
        ApplicationArguments applicationArguments,
        Banner printedBanner) {

    context.setEnvironment(environment);
    postProcessApplicationContext(context);
    addAotGeneratedInitializerIfNecessary(this.initializers);
    applyInitializers(context);
    listeners.contextPrepared(context);
    bootstrapContext.close(context);

    if (this.logStartupInfo) {
        logStartupInfo(context.getParent() == null);
        logStartupProfileInfo(context);
    }

    ConfigurableListableBeanFactory beanFactory = context.getBeanFactory();
    beanFactory.registerSingleton("springApplicationArguments", applicationArguments);
    if (printedBanner != null) {
        beanFactory.registerSingleton("springBootBanner", printedBanner);
    }
    // ...
}
prepareContext()는 ApplicationContext가 생성된 직후,
refresh() 전에 호출된다. 여기서 하는 일들:
postProcessApplicationContext()에서 beanNameGenerator, resourceLoader등을 설정한다contextPrepared이벤트를 발행한다프로파일 로그는 logStartupProfileInfo()에서 찍힌다:
private void logStartupProfileInfo(ConfigurableApplicationContext context) {
    Log log = getApplicationLog();
    if (log.isInfoEnabled()) {
        List<String> activeProfiles = quoteProfiles(context.getEnvironment().getActiveProfiles());
        if (ObjectUtils.isEmpty(activeProfiles)) {
            List<String> defaultProfiles = quoteProfiles(context.getEnvironment().getDefaultProfiles());
            log.info("No active profile set, falling back to " + defaultProfiles.size()
                    + ((defaultProfiles.size() == 1) ? " default profile: " : " default profiles: ")
                    + StringUtils.collectionToDelimitedString(defaultProfiles, ", "));
        } else {
            log.info("The following " + activeProfiles.size()
                    + ((activeProfiles.size() == 1) ? " profile is active: " : " profiles are active: ")
                    + StringUtils.collectionToDelimitedString(activeProfiles, ", "));
        }
    }
}
context.getEnvironment().getActiveProfiles()로 활성화된 프로파일 목록을 가져온다.
이 값은 여러 방법으로 설정할 수 있다:
application.yml의 spring.profiles.activeSPRING_PROFILES_ACTIVE-Dspring.profiles.active=localSpringApplication.setAdditionalProfiles()프로파일이 없으면 "No active profile set, falling back to default" 메시지가 나온다. 있으면 프로파일 개수에 따라 "profile is" 또는 "profiles are"를 적절히 선택해서 문법에 맞게 출력한다.
quoteProfiles()는 각 프로파일 이름을 따옴표로 감싼다. local이 "local"이 되는 것이다.
Multiple Spring Data modules found, entering strict repository configuration mode
Bootstrapping Spring Data JPA repositories in DEFAULT mode.
Finished Spring Data repository scanning in 81 ms. Found 2 JPA repository interfaces.
이 로그들은 refreshContext(context) 단계에서 찍힌다.
private void refreshContext(ConfigurableApplicationContext context) {
    if (this.registerShutdownHook) {
        shutdownHook.registerApplicationContext(context);
    }
    refresh(context);
}

protected void refresh(ConfigurableApplicationContext applicationContext) {
    applicationContext.refresh();
}
registerShutdownHook이 true면 JVM 종료 시 ApplicationContext를 정상적으로
닫기 위한 shutdown hook을 등록한다. 그 후 applicationContext.refresh()를 호출하는데,
이 한 줄이 Spring의 모든 것이 일어나는 곳이다.
refresh()가 호출되면 AbstractApplicationContext.refresh()가 실행된다:
public void refresh() throws BeansException, IllegalStateException {
    synchronized (this.startupShutdownMonitor) {
        prepareRefresh();
        ConfigurableListableBeanFactory beanFactory = obtainFreshBeanFactory();
        prepareBeanFactory(beanFactory);

        try {
            postProcessBeanFactory(beanFactory);
            invokeBeanFactoryPostProcessors(beanFactory);
            registerBeanPostProcessors(beanFactory);
            initMessageSource();
            initApplicationEventMulticaster();
            onRefresh();
            registerListeners();
            finishBeanFactoryInitialization(beanFactory);
            finishRefresh();
        } catch (BeansException ex) {
            destroyBeans();
            cancelRefresh(ex);
            throw ex;
        } finally {
            resetCommonCaches();
        }
    }
}
각 단계가 뭘 하는지 간단히 보면:
prepareRefresh(): 시작 시간 기록, 프로퍼티 소스 초기화
obtainFreshBeanFactory(): BeanFactory 생성 또는 갱신
prepareBeanFactory(): 클래스로더, 표현식 파서 등 설정
postProcessBeanFactory(): 서브클래스에서 BeanFactory 커스터마이징
invokeBeanFactoryPostProcessors(): BeanFactoryPostProcessor 실행.
Auto-configuration이 여기서 동작한다
registerBeanPostProcessors(): BeanPostProcessor 등록
onRefresh(): 서브클래스에서 특수 Bean 초기화. 웹 서버가 여기서 시작된다
finishBeanFactoryInitialization(): 모든 싱글톤 Bean 인스턴스화
finishRefresh(): 이벤트 발행, 라이프사이클 프로세서 시작
Repository 스캐닝은 invokeBeanFactoryPostProcessors() 단계에서 일어난다. JpaRepositoriesAutoConfiguration이 활성화되면서
RepositoryConfigurationDelegate가 동작한다.
public class RepositoryConfigurationDelegate {

    private static final Log logger = LogFactory.getLog(RepositoryConfigurationDelegate.class);

    public List<BeanComponentDefinition> registerRepositoriesIn(BeanDefinitionRegistry registry,
            RepositoryConfigurationExtension extension) {

        if (logger.isInfoEnabled()) {
            logger.info(LogMessage.format("Bootstrapping Spring Data %s repositories in %s mode.",
                    extension.getModuleName(),
                    configurationSource.getBootstrapMode().name()));
        }

        StopWatch watch = new StopWatch();
        watch.start();

        Collection<RepositoryConfiguration<RepositoryConfigurationSource>> configurations =
            extension.getRepositoryConfigurations(configurationSource, resourceLoader, inMultiStoreMode);

        List<BeanComponentDefinition> definitions = new ArrayList<>();

        for (RepositoryConfiguration<? extends RepositoryConfigurationSource> configuration : configurations) {
            BeanDefinitionBuilder definitionBuilder = builder.build(configuration);
            // Repository Bean 등록 로직...
            definitions.add(new BeanComponentDefinition(beanDefinition, beanName));
        }

        watch.stop();

        if (logger.isInfoEnabled()) {
            logger.info(LogMessage.format(
                "Finished Spring Data repository scanning in %s ms. Found %s %s repository interface(s).",
                watch.getTotalTimeMillis(),
                configurations.size(),
                extension.getModuleName()));
        }

        return definitions;
    }
}
StopWatch로 스캐닝 시간을 측정한다.
extension.getRepositoryConfigurations()가 실제로 클래스패스를 스캔해서
@Repository인터페이스들을 찾는다. 찾은 개수와 소요 시간을 로그로 출력한다.
"Multiple Spring Data modules found" 메시지는 JPA와 Redis처럼
여러 Spring Data 모듈이 동시에 존재할 때 출력된다:
public abstract class RepositoryConfigurationExtensionSupport implements RepositoryConfigurationExtension {

    private static final Log logger = LogFactory.getLog(RepositoryConfigurationExtensionSupport.class);

    @Override
    public <T extends RepositoryConfigurationSource> Collection<RepositoryConfiguration<T>> getRepositoryConfigurations(
            T configurationSource, ResourceLoader loader, boolean strictMatchesOnly) {

        if (multipleStoresDetected()) {
            if (logger.isInfoEnabled()) {
                logger.info("Multiple Spring Data modules found, entering strict repository configuration mode");
            }
        }

        // Repository 스캐닝 로직...
    }

    private boolean multipleStoresDetected() {
        // JPA, MongoDB, Redis 등 여러 모듈이 클래스패스에 있는지 확인
    }
}
Strict mode에서는 각 Repository가 어떤 저장소에 속하는지 더 엄격하게 판단한다. @Entity가 붙은 엔티티를 사용하면 JPA, @RedisHash가 붙은 엔티티를 사용하면 Redis로 인식한다.
Tomcat initialized with port 8080 (http)
Starting service [Tomcat]
Starting Servlet engine: [Apache Tomcat/10.1.48]
refresh() 과정 중 onRefresh() 단계에서 내장 톰캣이 생성된다.
public class ServletWebServerApplicationContext extends GenericWebApplicationContext
        implements ConfigurableWebServerApplicationContext {

    @Override
    protected void onRefresh() {
        super.onRefresh();
        try {
            createWebServer();
        } catch (Throwable ex) {
            throw new ApplicationContextException("Unable to start web server", ex);
        }
    }

    private void createWebServer() {
        WebServer webServer = this.webServer;
        ServletContext servletContext = getServletContext();

        if (webServer == null && servletContext == null) {
            StartupStep createWebServer = getApplicationStartup().start("spring.boot.webserver.create");
            ServletWebServerFactory factory = getWebServerFactory();
            createWebServer.tag("factory", factory.getClass().toString());
            this.webServer = factory.getWebServer(getSelfInitializer());
            createWebServer.end();
            getBeanFactory().registerSingleton("webServerGracefulShutdown",
                    new WebServerGracefulShutdownLifecycle(this.webServer));
            getBeanFactory().registerSingleton("webServerStartStop",
                    new WebServerStartStopLifecycle(this, this.webServer));
        } else if (servletContext != null) {
            try {
                getSelfInitializer().onStartup(servletContext);
            } catch (ServletException ex) {
                throw new ApplicationContextException("Cannot initialize servlet context", ex);
            }
        }
        initPropertySources();
    }
}
createWebServer()는 아직 웹 서버가 없고 외부 ServletContext도 없을 때만
실행된다. WAR로 배포해서 외부 톰캣에서 실행하는 경우에는 이 로직을 건너뛴다.
getWebServerFactory()는 BeanFactory에서 ServletWebServerFactory 타입의 Bean을 찾는다.
Spring Boot의 Auto-configuration이 TomcatServletWebServerFactory를 자동으로 등록해둔다.
factory.getWebServer()가 호출되면 실제 톰캣 인스턴스가 생성된다.
public class TomcatServletWebServerFactory extends AbstractServletWebServerFactory
        implements ConfigurableTomcatWebServerFactory {

    @Override
    public WebServer getWebServer(ServletContextInitializer... initializers) {
        Tomcat tomcat = new Tomcat();

        File baseDir = (this.baseDirectory != null) ? this.baseDirectory : createTempDir("tomcat");
        tomcat.setBaseDir(baseDir.getAbsolutePath());

        for (LifecycleListener listener : this.serverLifecycleListeners) {
            tomcat.getServer().addLifecycleListener(listener);
        }

        Connector connector = new Connector(this.protocol);
        connector.setThrowOnFailure(true);
        tomcat.getService().addConnector(connector);
        customizeConnector(connector);
        tomcat.setConnector(connector);

        tomcat.getHost().setAutoDeploy(false);
        configureEngine(tomcat.getEngine());

        for (Connector additionalConnector : this.additionalTomcatConnectors) {
            tomcat.getService().addConnector(additionalConnector);
        }

        prepareContext(tomcat.getHost(), initializers);

        return getTomcatWebServer(tomcat);
    }
}
단계별로 보면:
"Tomcat initialized with port 8080" 로그는 TomcatWebServer 생성자에서 찍힌다.
public class TomcatWebServer implements WebServer {

    private static final Log logger = LogFactory.getLog(TomcatWebServer.class);

    public TomcatWebServer(Tomcat tomcat, boolean autoStart, Shutdown shutdown) {
        Assert.notNull(tomcat, "Tomcat Server must not be null");
        this.tomcat = tomcat;
        this.autoStart = autoStart;
        this.gracefulShutdown = (shutdown == Shutdown.GRACEFUL) ? new GracefulShutdown(tomcat) : null;
        initialize();
    }

    private void initialize() throws WebServerException {
        logger.info("Tomcat initialized with port(s): " + getPortsDescription(false));
        synchronized (this.monitor) {
            try {
                addInstanceIdToEngineName();

                Context context = findContext();
                context.addLifecycleListener((event) -> {
                    if (context.equals(event.getSource()) && Lifecycle.START_EVENT.equals(event.getType())) {
                        removeServiceConnectors();
                    }
                });

                this.tomcat.start();

                rethrowDeferredStartupExceptions();

                try {
                    ContextBindings.bindClassLoader(context, context.getNamingToken(), getClass().getClassLoader());
                } catch (NamingException ex) {
                    // Naming is not enabled, ignore
                }

                startDaemonAwaitThread();
            } catch (Exception ex) {
                stopSilently();
                destroySilently();
                throw new WebServerException("Unable to start embedded Tomcat", ex);
            }
        }
    }

    private String getPortsDescription(boolean localPort) {
        StringBuilder description = new StringBuilder();
        Connector[] connectors = this.tomcat.getService().findConnectors();
        for (int i = 0; i < connectors.length; i++) {
            if (i > 0) {
                description.append(' ');
            }
            int port = localPort ? connectors[i].getLocalPort() : connectors[i].getPort();
            description.append(port);
            description.append(" (");
            description.append(connectors[i].getScheme());
            description.append(')');
        }
        return description.toString();
    }
}
initialize() 메서드에서:
this.tomcat.start()로 톰캣을 시작한다getPortsDescription()은 모든 커넥터를 순회하면서 "8080 (http)" 형태의 문자열을 만든다. HTTPS가 설정되어 있으면 "8080 (http) 8443 (https)" 같이 출력된다.
HikariPool-1 - Starting...
HikariPool-1 - Added connection com.mysql.cj.jdbc.ConnectionImpl@36fe83d
HikariPool-1 - Start completed.
refresh() 과정 중 finishBeanFactoryInitialization() 단계에서
모든 싱글톤 Bean이 생성된다. DataSource Bean이 생성될 때 HikariCP가 초기화된다.
Spring Boot의 DataSourceAutoConfiguration이 HikariDataSource를 자동으로 구성한다. HikariDataSource가 생성되면 내부적으로 HikariPool이 만들어진다.
public final class HikariPool extends PoolBase implements HikariPoolMXBean, IBagStateListener {

    private static final Logger LOGGER = LoggerFactory.getLogger(HikariPool.class);

    public HikariPool(final HikariConfig config) {
        super(config);

        this.suspendResumeLock = config.isAllowPoolSuspension() ? new SuspendResumeLock() : SuspendResumeLock.FAUX_LOCK;
        this.houseKeepingExecutorService = initializeHouseKeepingExecutorService();

        checkFailFast();

        if (config.getMetricsTrackerFactory() != null) {
            setMetricsTrackerFactory(config.getMetricsTrackerFactory());
        } else {
            setMetricRegistry(config.getMetricRegistry());
        }

        setHealthCheckRegistry(config.getHealthCheckRegistry());

        handleMBeans(this, true);

        ThreadFactory threadFactory = config.getThreadFactory();

        LinkedBlockingQueue<Runnable> addConnectionQueue = new LinkedBlockingQueue<>(config.getMaximumPoolSize());
        this.addConnectionQueueReadOnlyView = unmodifiableCollection(addConnectionQueue);
        this.addConnectionExecutor = createThreadPoolExecutor(
            addConnectionQueue, poolName + " connection adder", threadFactory, new ThreadPoolExecutor.DiscardOldestPolicy());
        this.closeConnectionExecutor = createThreadPoolExecutor(
            config.getMaximumPoolSize(), poolName + " connection closer", threadFactory, new ThreadPoolExecutor.CallerRunsPolicy());

        this.leakTaskFactory = new ProxyLeakTaskFactory(config.getLeakDetectionThreshold(), houseKeepingExecutorService);

        this.houseKeeperTask = houseKeepingExecutorService.scheduleWithFixedDelay(
            new HouseKeeper(), 100L, housekeepingPeriodMs, MILLISECONDS);

        if (Boolean.getBoolean("com.zaxxer.hikari.blockUntilFilled") && config.getInitializationFailTimeout() > 1) {
            addConnectionExecutor.setCorePoolSize(Math.min(16, Runtime.getRuntime().availableProcessors()));
            addConnectionExecutor.setMaximumPoolSize(Math.min(16, Runtime.getRuntime().availableProcessors()));

            final long startTime = currentTime();
            while (elapsedMillis(startTime) < config.getInitializationFailTimeout() && getTotalConnections() < config.getMinimumIdle()) {
                quietlySleep(MILLISECONDS.toMillis(100));
            }

            addConnectionExecutor.setCorePoolSize(1);
            addConnectionExecutor.setMaximumPoolSize(1);
        }

        LOGGER.info("{} - Starting...", poolName);
        // 커넥션 풀 초기화...
        LOGGER.info("{} - Start completed.", poolName);
    }
}
생성자에서 하는 일들:
커넥션이 추가될 때 찍히는 로그는 PoolBase에서 나온다.
abstract class PoolBase {

    private static final Logger LOGGER = LoggerFactory.getLogger(PoolBase.class);

    PoolEntry newPoolEntry() throws Exception {
        return new PoolEntry(newConnection(), this, isReadOnly, isAutoCommit);
    }

    private Connection newConnection() throws Exception {
        final long start = currentTime();

        Connection connection = null;
        try {
            String username = config.getUsername();
            String password = config.getPassword();

            connection = (username == null)
                ? dataSource.getConnection()
                : dataSource.getConnection(username, password);

            if (connection == null) {
                throw new SQLTransientConnectionException("DataSource returned null unexpectedly");
            }

            setupConnection(connection);
            lastConnectionFailure.set(null);

            return connection;
        } catch (Exception e) {
            if (connection != null) {
                quietlyCloseConnection(connection, "(Failed to setup connection)");
            } else if (getLastConnectionFailure() == null) {
                LOGGER.debug("{} - Failed to create/setup connection: {}", poolName, e.getMessage());
            }

            lastConnectionFailure.set(e);
            throw e;
        } finally {
            if (metricsTracker != null) {
                metricsTracker.recordConnectionCreated(elapsedMillis(start));
            }
        }
    }

    void quietlyCloseConnection(final Connection connection, final String closureReason) {
        if (connection != null) {
            try {
                LOGGER.debug("{} - Closing connection {}: {}", poolName, connection, closureReason);
                // ...
            } catch (Exception e) {
                LOGGER.debug("{} - Closing connection {} failed", poolName, connection, e);
            }
        }
    }
}
newConnection()은 DataSource.getConnection()을 호출해서 실제 DB 커넥션을 얻는다. MySQL의 경우 com.mysql.cj.jdbc.ConnectionImpl 객체가 반환된다. 로그에 보이는 @36fe83d는 이 객체의 해시코드다.
Started NewserverApplication in 2.583 seconds (process running for 2.884)
run() 메서드 끝부분에서 StartupInfoLogger.logStarted()가 호출된다.
Duration timeTaken = Duration.ofNanos(System.nanoTime() - startTime);
if (this.logStartupInfo) {
    new StartupInfoLogger(this.mainApplicationClass).logStarted(getApplicationLog(), timeTaken);
}
처음에 기록해둔 startTime과 현재 시간의 차이로 Duration을 계산한다.
void logStarted(Log applicationLog, Duration timeTaken) {
    if (applicationLog.isInfoEnabled()) {
        applicationLog.info(getStartedMessage(timeTaken));
    }
}

private CharSequence getStartedMessage(Duration timeTaken) {
    StringBuilder message = new StringBuilder();
    message.append("Started ");
    appendApplicationName(message);
    message.append(" in ");
    message.append(timeTaken.toMillis() / 1000.0);
    message.append(" seconds");

    try {
        double uptime = ManagementFactory.getRuntimeMXBean().getUptime() / 1000.0;
        message.append(" (process running for ");
        message.append(uptime);
        message.append(")");
    } catch (Throwable ex) {
        // No JMX support, ignore
    }

    return message;
}
두 가지 시간이 출력된다.
Spring 컨텍스트 초기화 시간 (2.583 seconds): Duration.toMillis() / 1000.0으로 계산한다.
run() 메서드 시작부터 끝까지의 시간이다.
JVM 실행 시간 (process running for 2.884): ManagementFactory.getRuntimeMXBean().getUptime()으로 가져온다.
JVM이 시작된 시점부터의 시간이므로 Spring 초기화 시간보다 약간 길다.
그 차이는 JVM 부팅, 클래스 로딩, main() 호출 전까지의 시간이다.
RuntimeMXBean은 JMX(Java Management Extensions)의 일부로, JVM의 런타임 정보를 제공한다.
getUptime()은 JVM 시작 후 경과 시간을 밀리초로 반환한다.
Spring Boot를 실행하면:
main()에서 SpringApplication.run()이 호출된다SpringApplication 인스턴스가 생성되고 run(args)가 실행된다printBanner()에서 SpringBootBanner가 ASCII 아트를 System.out에 출력한다StartupInfoLogger.logStarting()에서 애플리케이션 이름, Java 버전, PID를 조합해 "Starting..." 로그를 찍는다prepareContext()에서 logStartupProfileInfo()가 Environment.getActiveProfiles()로 프로파일 정보를 출력한다refreshContext()에서 ApplicationContext.refresh()가 호출되고:
invokeBeanFactoryPostProcessors()에서 Auto-configuration이 동작하고 RepositoryConfigurationDelegate가 Repository를 스캔한다onRefresh()에서 ServletWebServerApplicationContext가 TomcatServletWebServerFactory를 통해 톰캣을 생성한다finishBeanFactoryInitialization()에서 DataSource Bean 생성 시 HikariPool이 초기화된다StartupInfoLogger.logStarted()에서 System.nanoTime() 차이와 RuntimeMXBean.getUptime()으로 기동 시간을 계산해 "Started..." 로그를 찍는다.생각보다 너무나도 많은 코드들이 실행되고 있었다. 매일 아무 생각 없이 실행 버튼을
누르고 로그가 올라오는 걸 봤는데, 그 뒤에서 배너 출력부터 Environment 준비,
ApplicationContext 생성, Bean 스캐닝, 톰캣 초기화,
커넥션 풀 생성까지 수많은 일들이 순식간에 일어나고 있었다.
이번에 직접 소스코드를 까보면서 "이 로그가 여기서 찍히는구나" 하고 연결되는 순간이 꽤 재밌었다.
다음에는 Auto-configuration이 어떻게 동작하는지, @EnableAutoConfiguration이 뭘 하는지 더
깊게 들어가봐야겠다.